Table of Contents
Office365 Plugin
This is a dedicated article for the Office365 (XML) Report Plugin.
It's supported by the following deployment environments:
- Office365 Desktop
- Office365 Web
- Office365 Mobile
- Outlook for Mac
- Office for Mac 2016
- Office for Mac 2019
The Outlook 365 button works similar to the Outlook Plugin but mainly used for the web-based Outlook access O365.
The set of supported features are listed in the comparison table in the main article.
The important aspect of the O365 Plugin (XML) is that it works differently compared to the Outlook one (msi).
The office365 plugin dynamically reads the settings from the Lucy server and uses the email/settings which are configured there.
While the MSI can be configured multiple times and have different settings, the XML plugin will always work only according to the settings that are currently being set within Lucy Incident Plugin Settings.
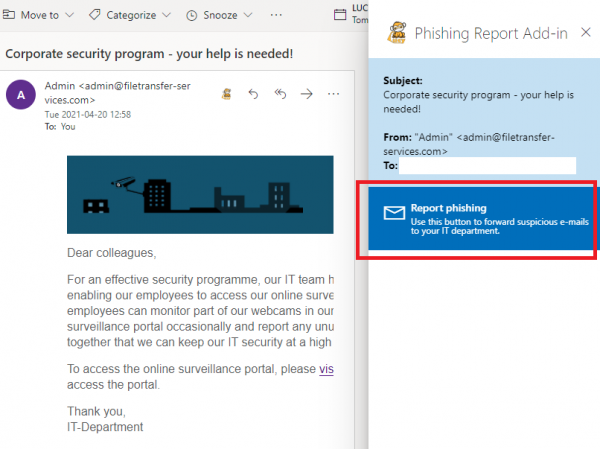
The O365 Button design is also different.
The logo button that's presented in the interface does not do the report itself - it initiates the addon.
The sliding-in interface from the side is the addon plugin iteself and only the blue-button can perform the report.
So it takes more steps to report a message using O365 Report Plugin.

For its work, it is necessary to have a network connection between Lucy and O365 server in case if you use a web browser as a client, and a network connection between Lucy and user's workstation in case if a desktop client is used.
The XML is the file that needs to be installed for O365 plugin to work.
Deployment
Outlook 365 sequence:
Individual Installation
Step 1
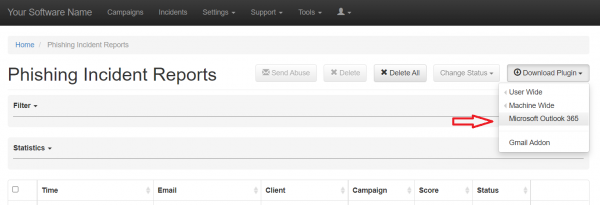
Go Incidents > Download Plugin, choose an option "Microsoft Outlook 365", your browser will download an XML file
 Step 2
Go to MS Outlook - https://outlook.live.com/owa/
Step 3
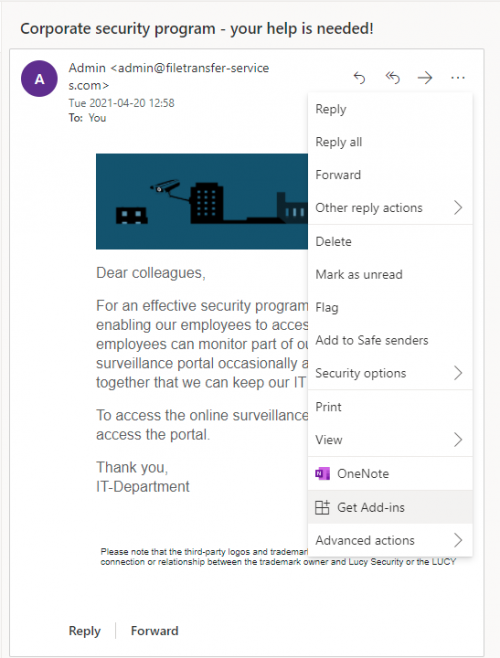
Open any email and press "Get Add-ins" as it described on the screenshot below
Step 4
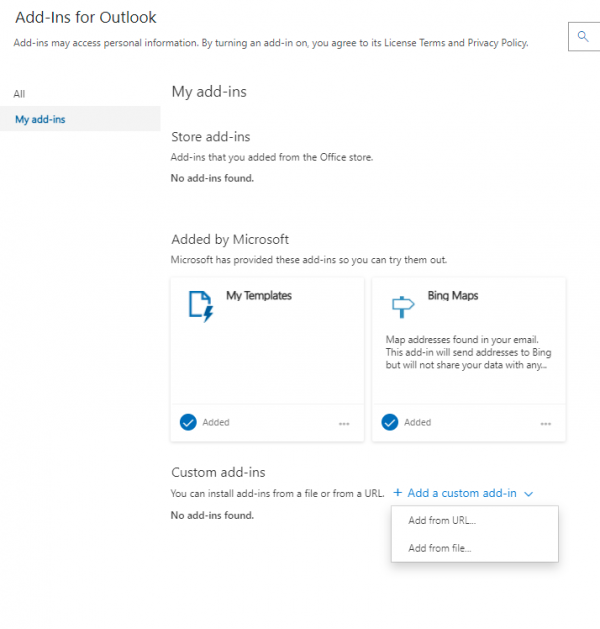
Go to "My add-ins" and upload the Plugin's XML file
Step 5
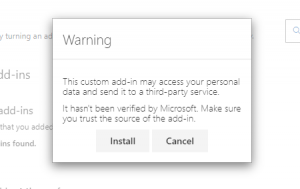
The Warning message would appear, press Install
Step 6
Once installed, the Plugin will appear in the custom add-ins section

Step 7
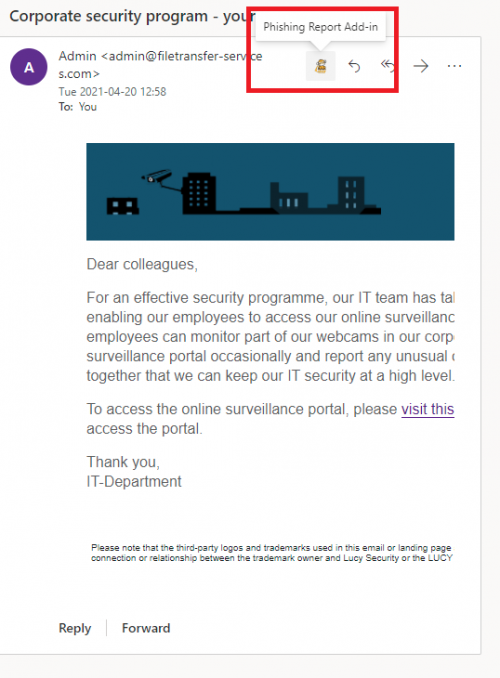
Now in email panel, you will see the Plugin's icon, which is the Report Plugin
Step 8
To perform a report press the Button and hit "Send Report" on the right
Centralized O365 Plugin Installation For Multiple Users
You can install the O365 plugin for multiple users in the Microsoft 365 admin center: https://go.microsoft.com/fwlink/p/?linkid=2024339
Step 1
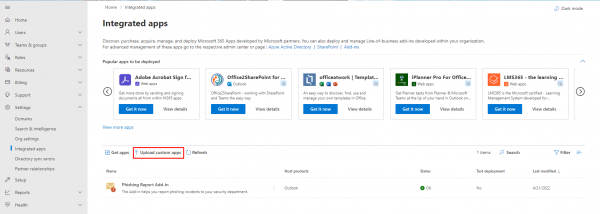
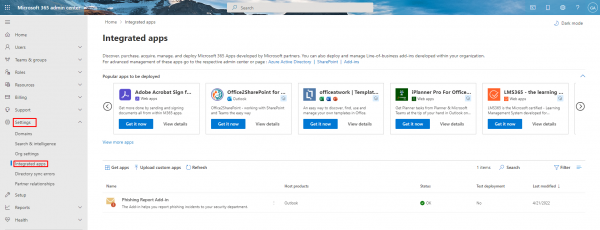
In the admin center, go to the Settings → Integrated apps.
Step 2
Step 3
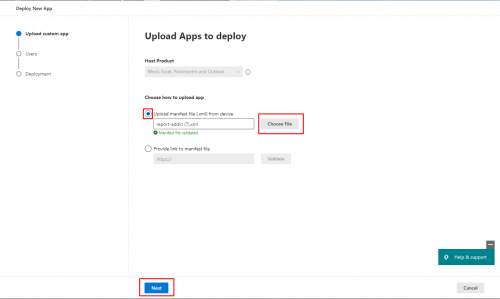
Select "Upload manifest file (.xml) from device", press the "Choose File" and upload the Plugin's XML file.
After the uploading and validating of the file press "Next".
Step 4
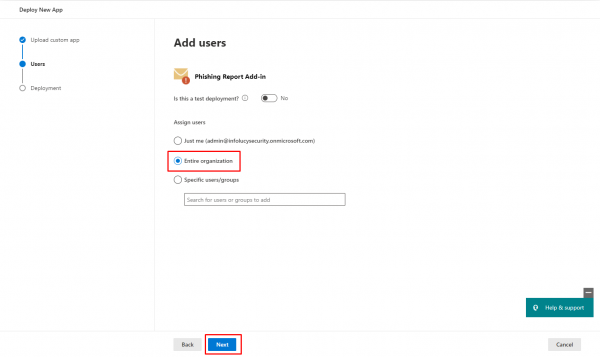
Select the "Entire organization" option and press "Next".
Step 5
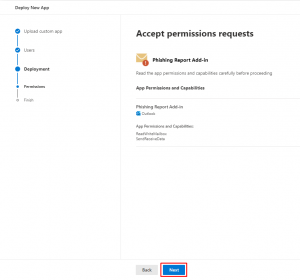
Accept permissions requests by pressing "Next"
Step 6
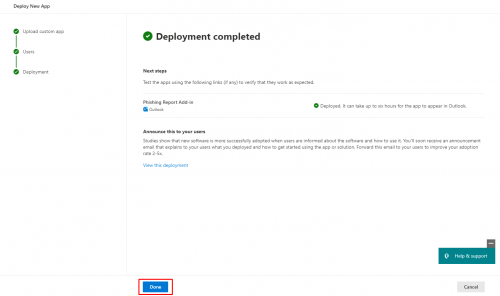
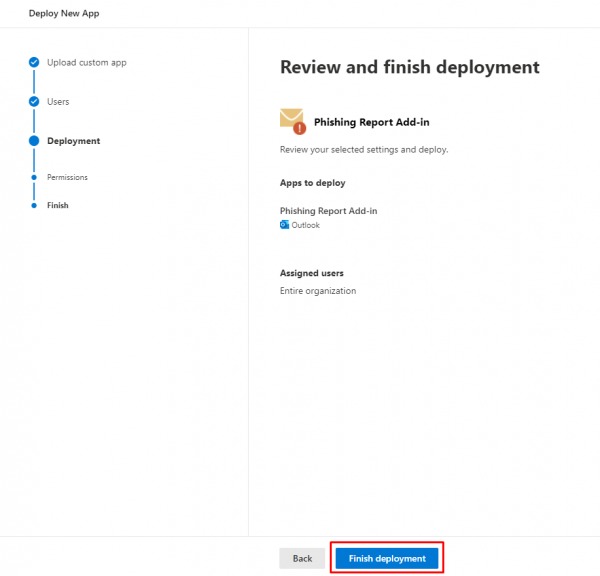
Review and finish deployment by pressing "Finish deployment"
O365 Mobile plugin
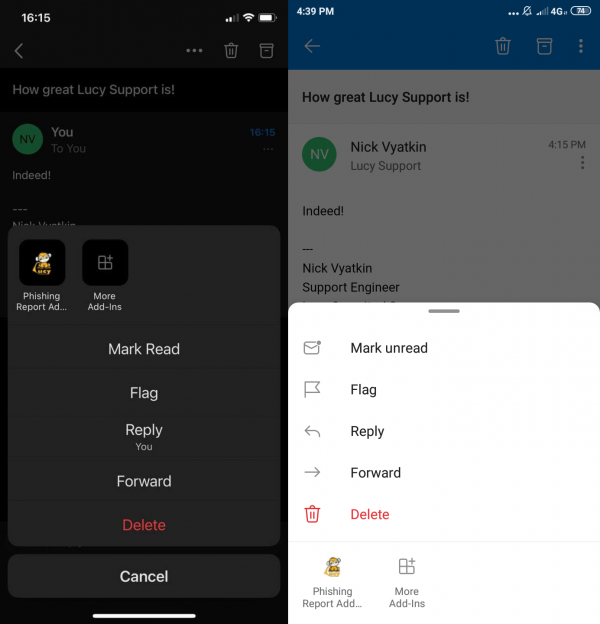
Phishing plugin can be utilized in the O365 Mobile version both on Android and iOS platforms. In order to make the plugin available for mobile applications simply install the XML plugin as described in the according to the section above. After the plugin is deployed for the web version it will automatically appear in the Outlook mobile application. Feel free to contact the support team if any issues occur.
It is also possible to deploy O365 XML into Exchange with compatibility mode, the report button will be available for Android & iOS as well.
Deployment on Apple Computer
Microsoft has "Office for Mac" product, which requires the O365 account to run. When you open Outlook application on Mac, it fetches all plugins from the corresponding O365 account and shows them in the interface, so the plugin is available both in the web interface and on Mac. Therefore, you first need to install the plugin in O365 before you set it up on a MAC.
Outlook 365 sequence:
- Go to incidents, press "Download Plugin" → "Microsoft Outlook 365", your browser will download an XML file
- Go to MS Outlook - https://outlook.live.com/owa/
- Press "cog" icon and then "Manage Add-ins"
- Click "Click here to add a custom add-in" text right below the page title
- Upload the XML you downloaded on step 1
- Go to any email in your inbox, you will see a little monkey on the top right in email header
- Press the monkey and hit "Send Report" on the right
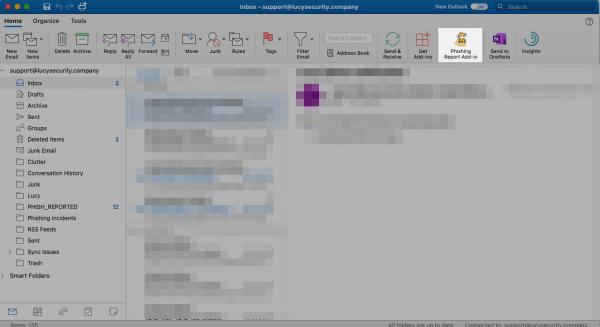
- On Macs the "LUCY" symbol will be visible on the ribbon menu

